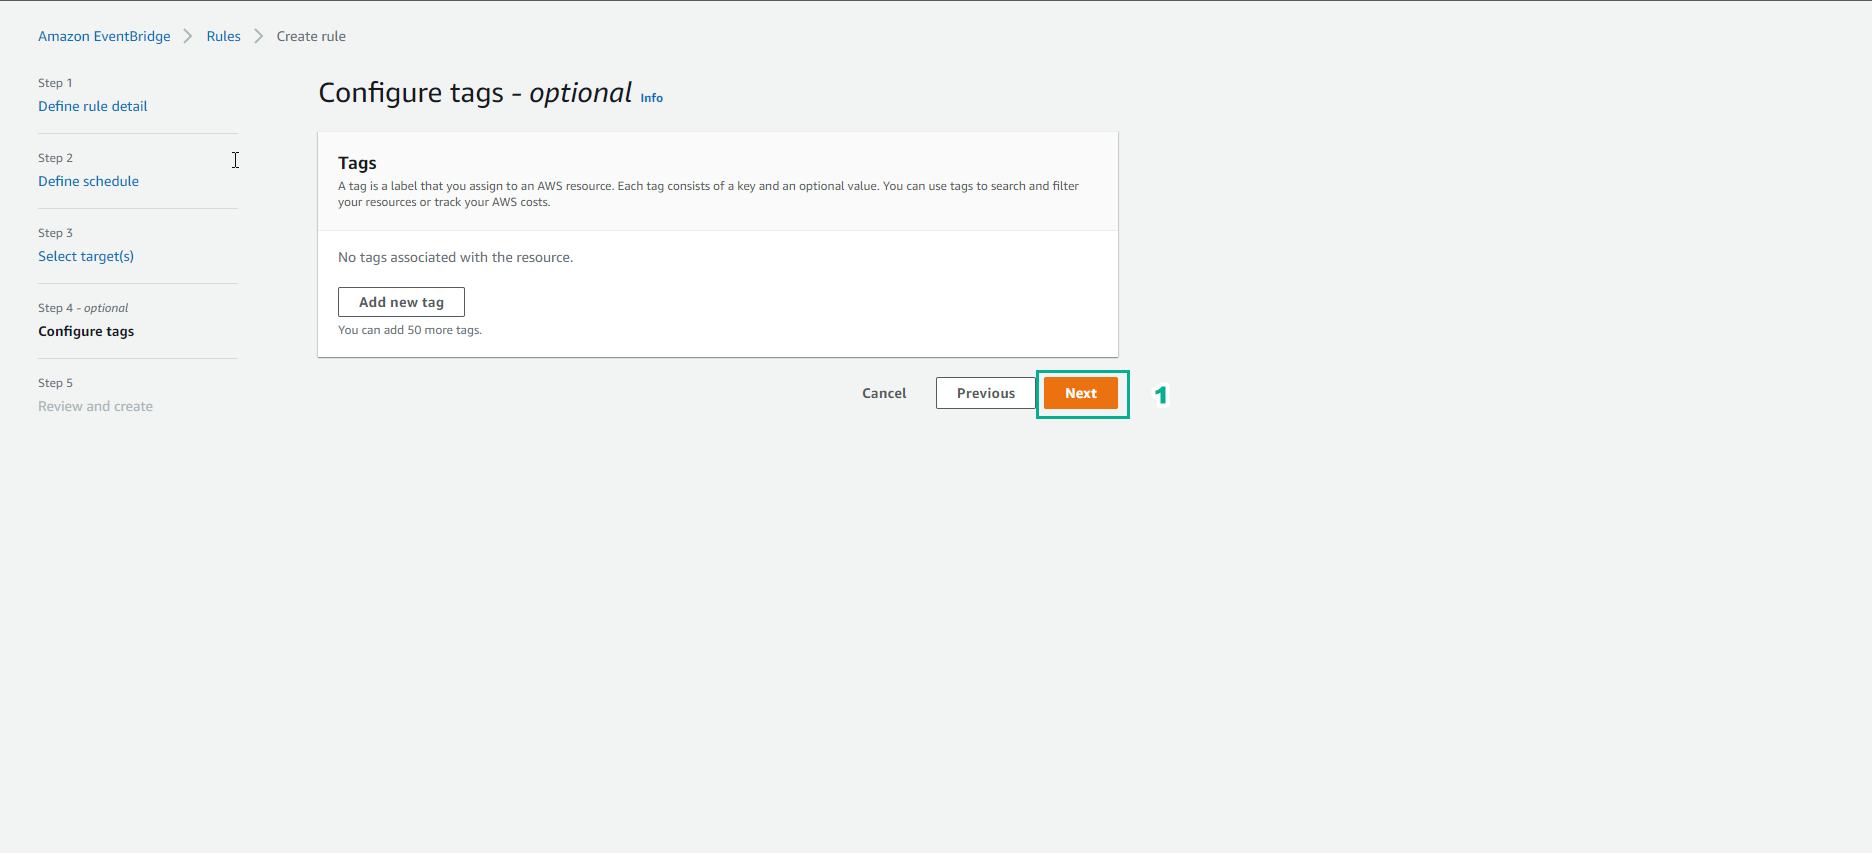
Function stop instance
Tạo Lambda Function thực hiện chức năng Stop instances
- Truy cập AWS Management Console
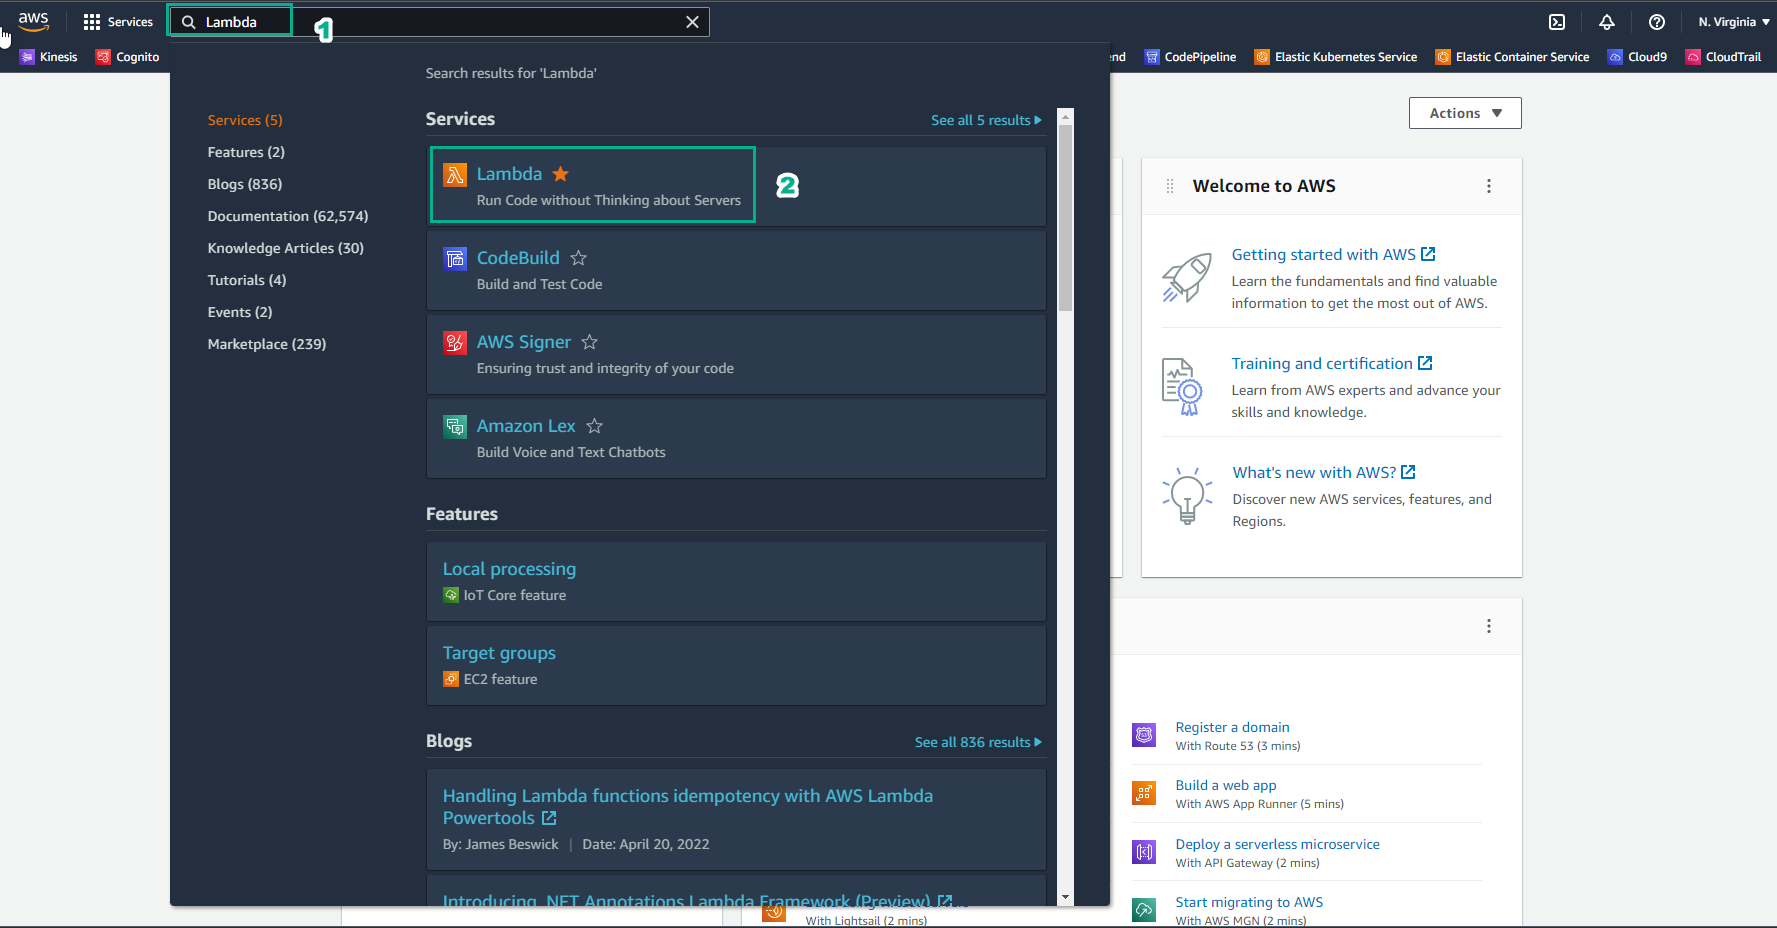
- Trong giao diện AWS Lambda
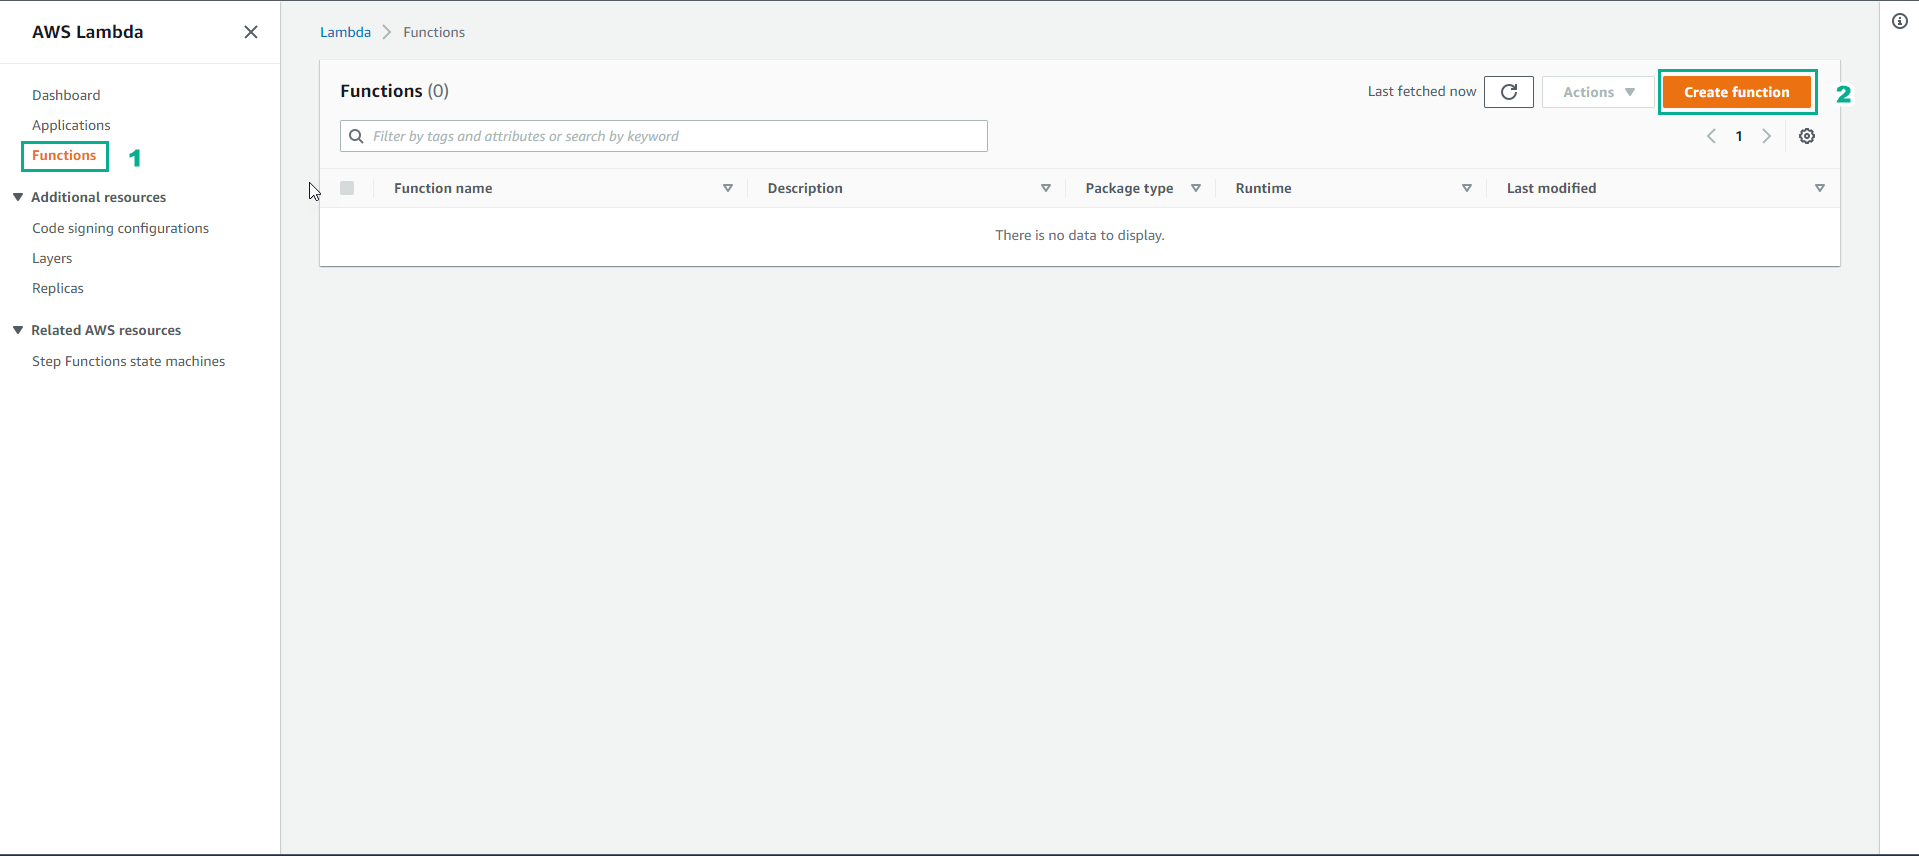
- Chọn Function
- Chọn Create function
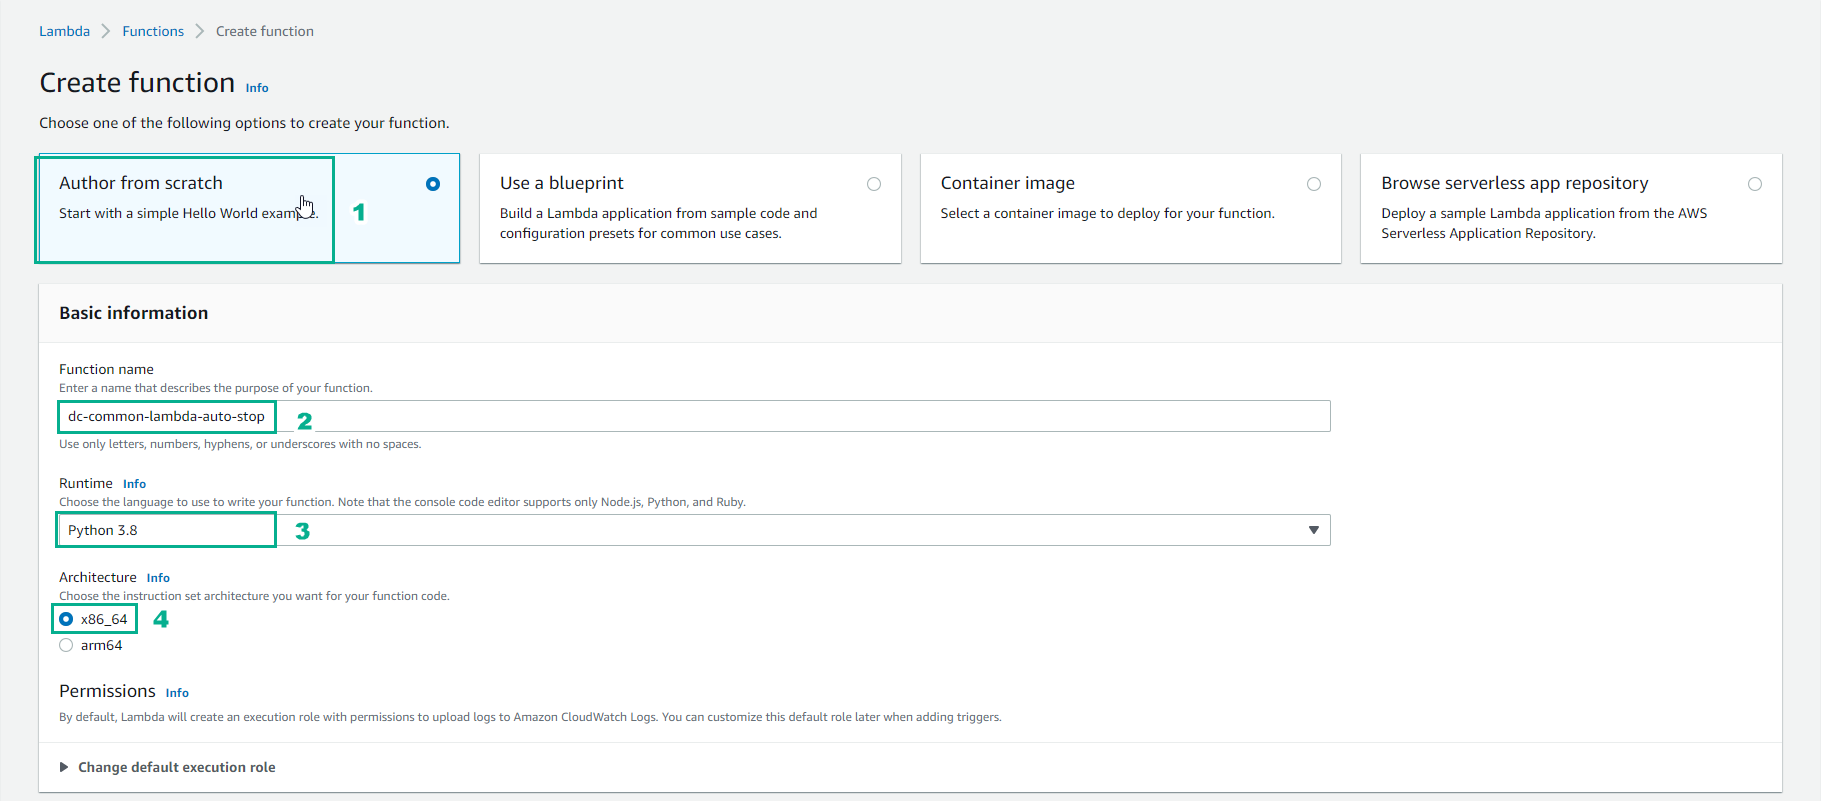
- Trong giao diện Create function
- Chọn Author from scratch
- Function name, nhập
dc-common-lambda-auto-stop - Runtime, chọn Python 3.14
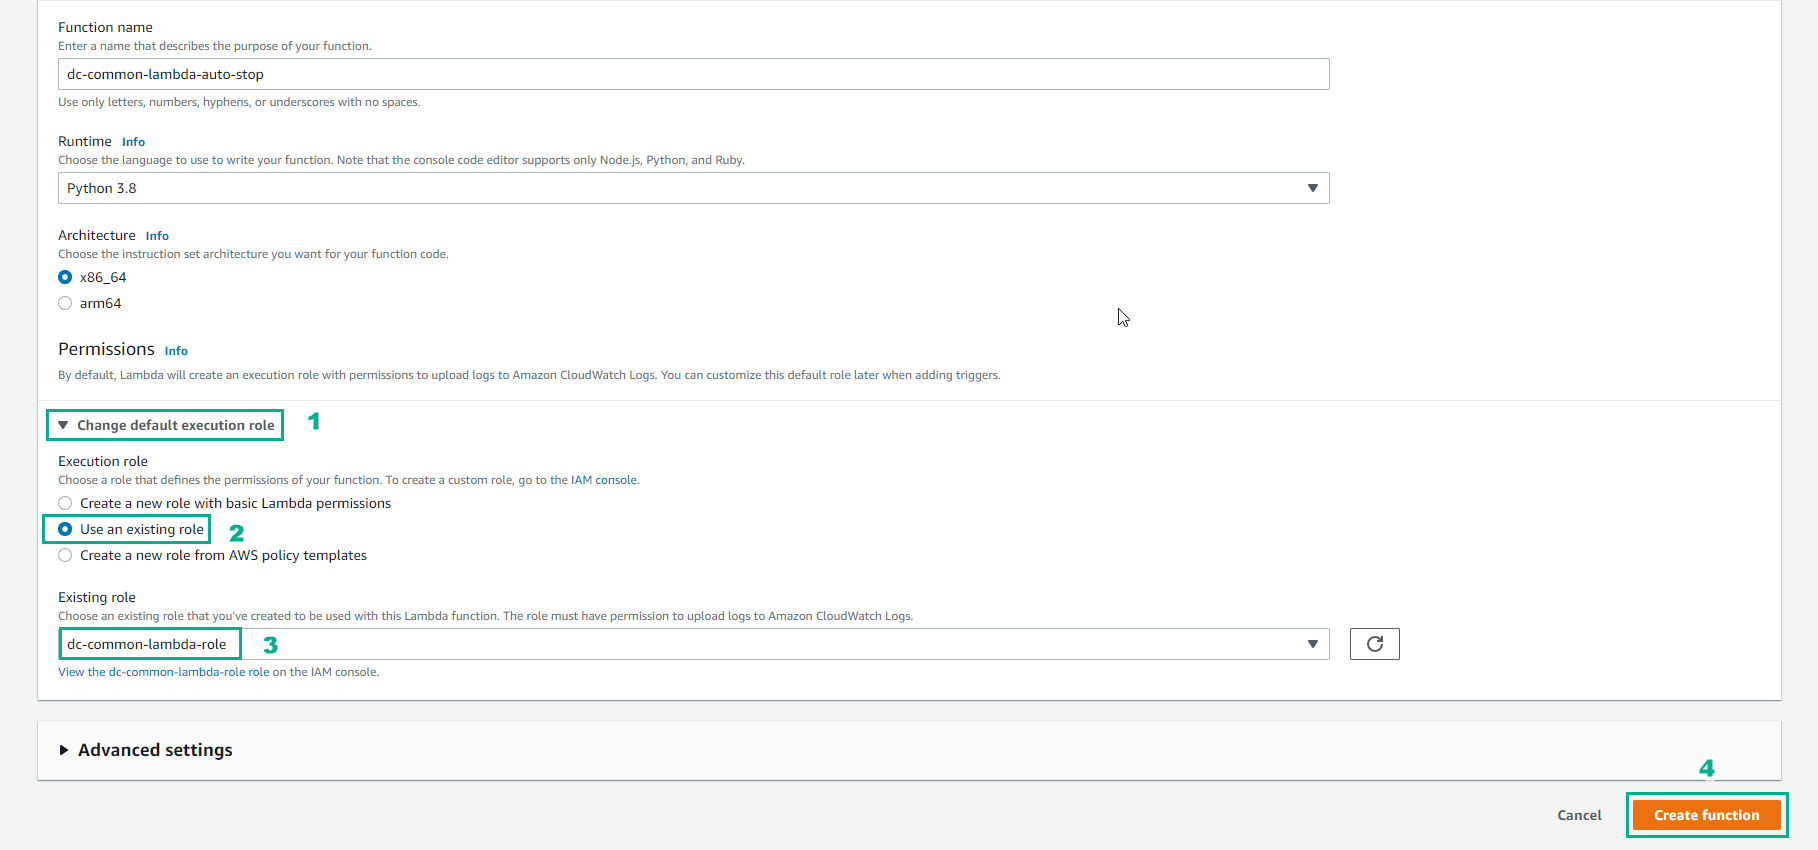
- Tiếp tục trong giao diện Create function
- Chọn Change default execution role
- Chọn Use an existing role
- Chọn dc-common-lambda-role
- Chọn Create function
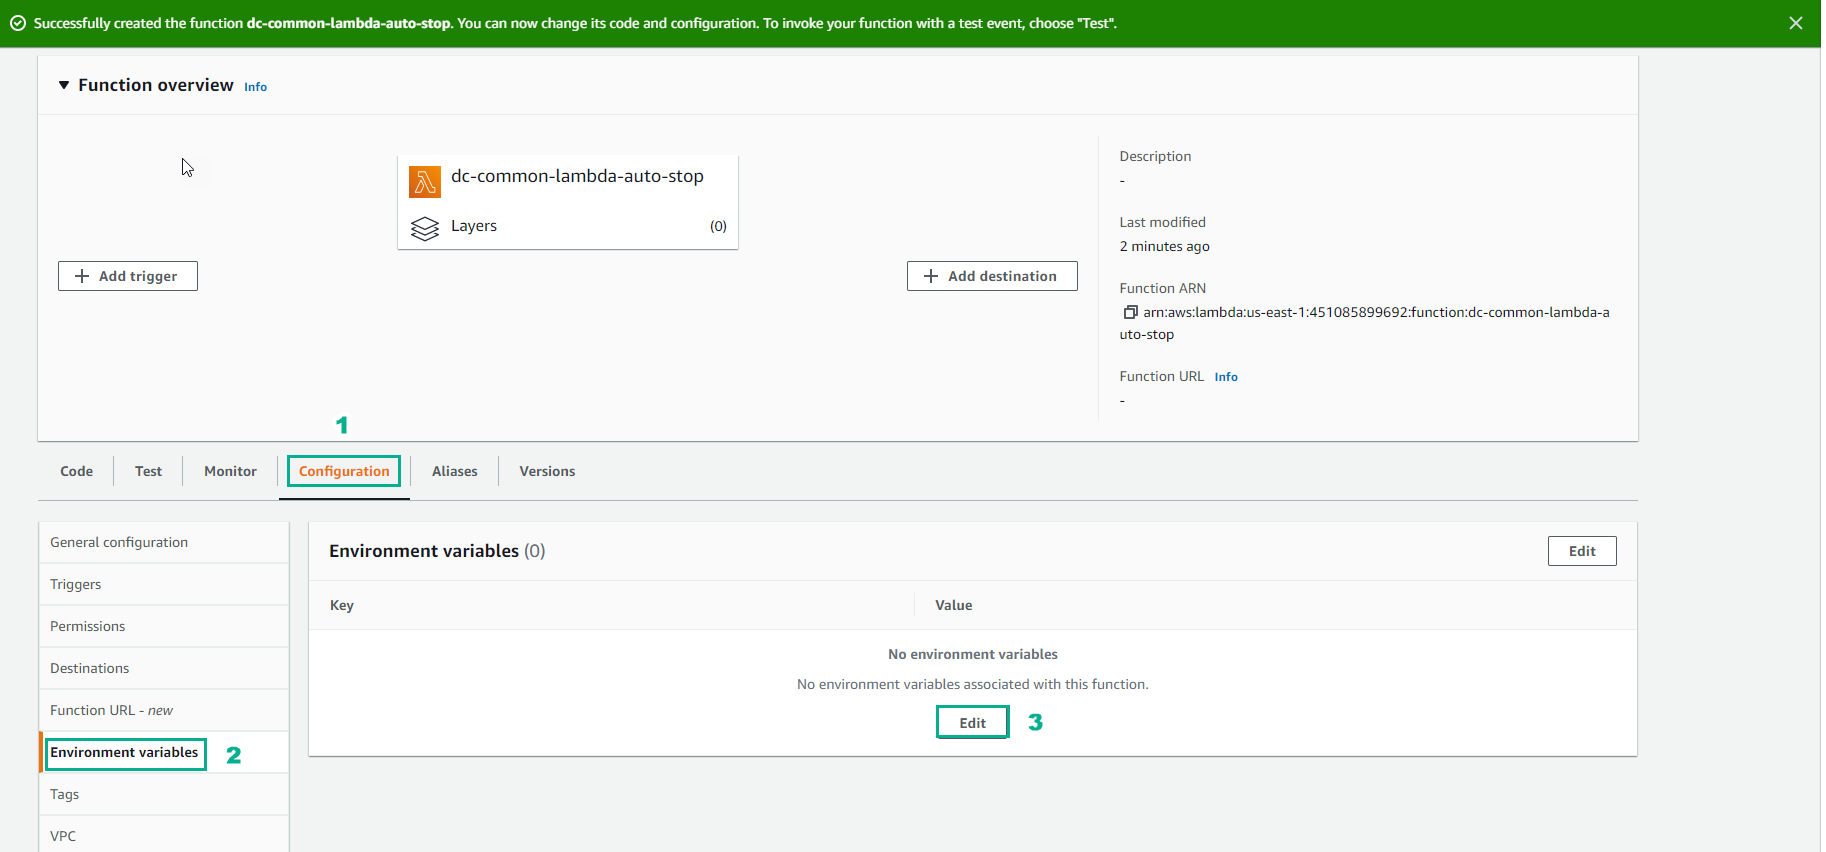
- Sau khi tạo function thành công
- Chọn Configuration
- Chọn Environment variables
- Chọn Edit
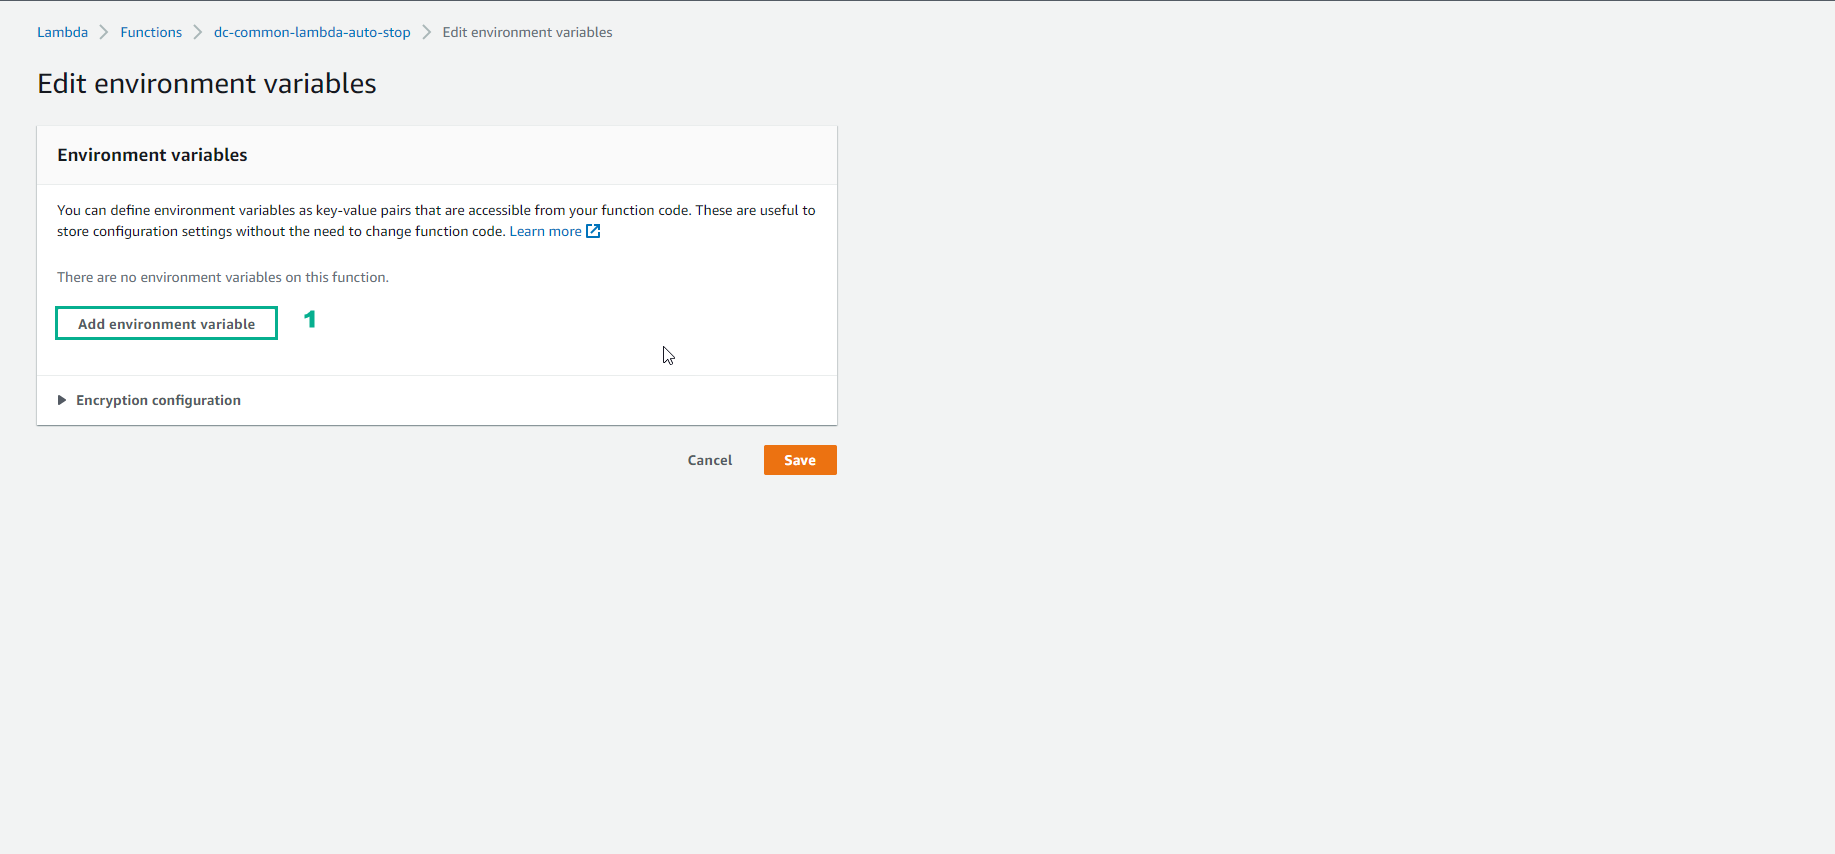
- Trong giao diện Edit environment variables
- Chọn Add environment variable
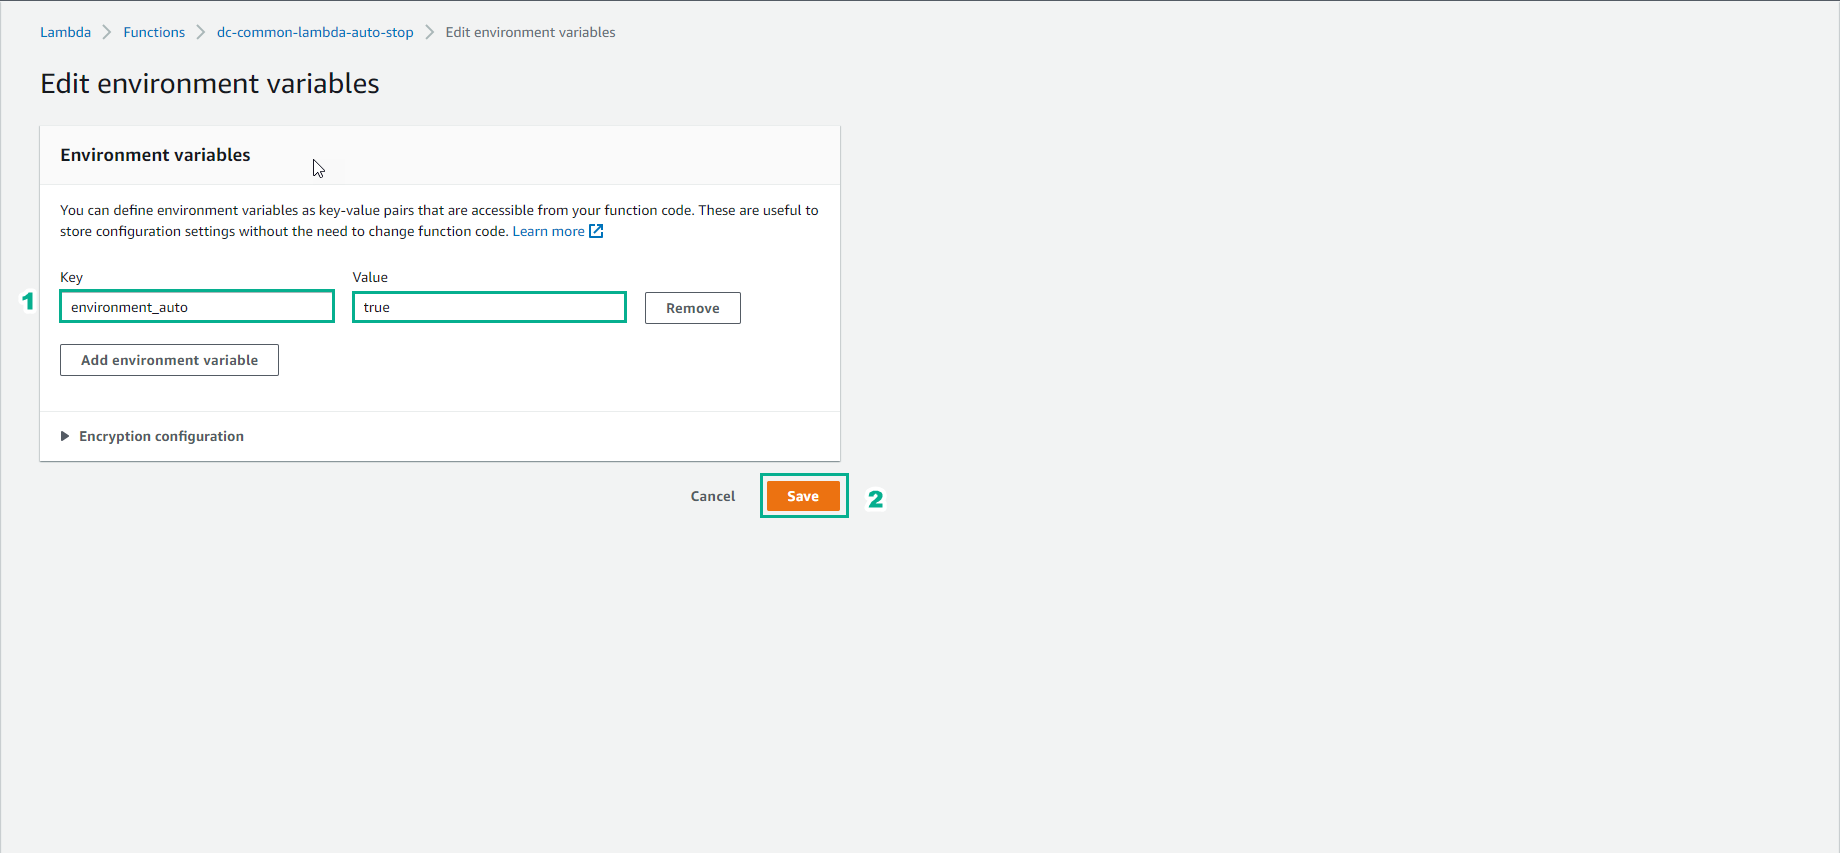
- Trong giao diện Edit environment variables
- Key, nhập
environment_auto - Value, nhập
true
- Sau khi tạo môi trường xong
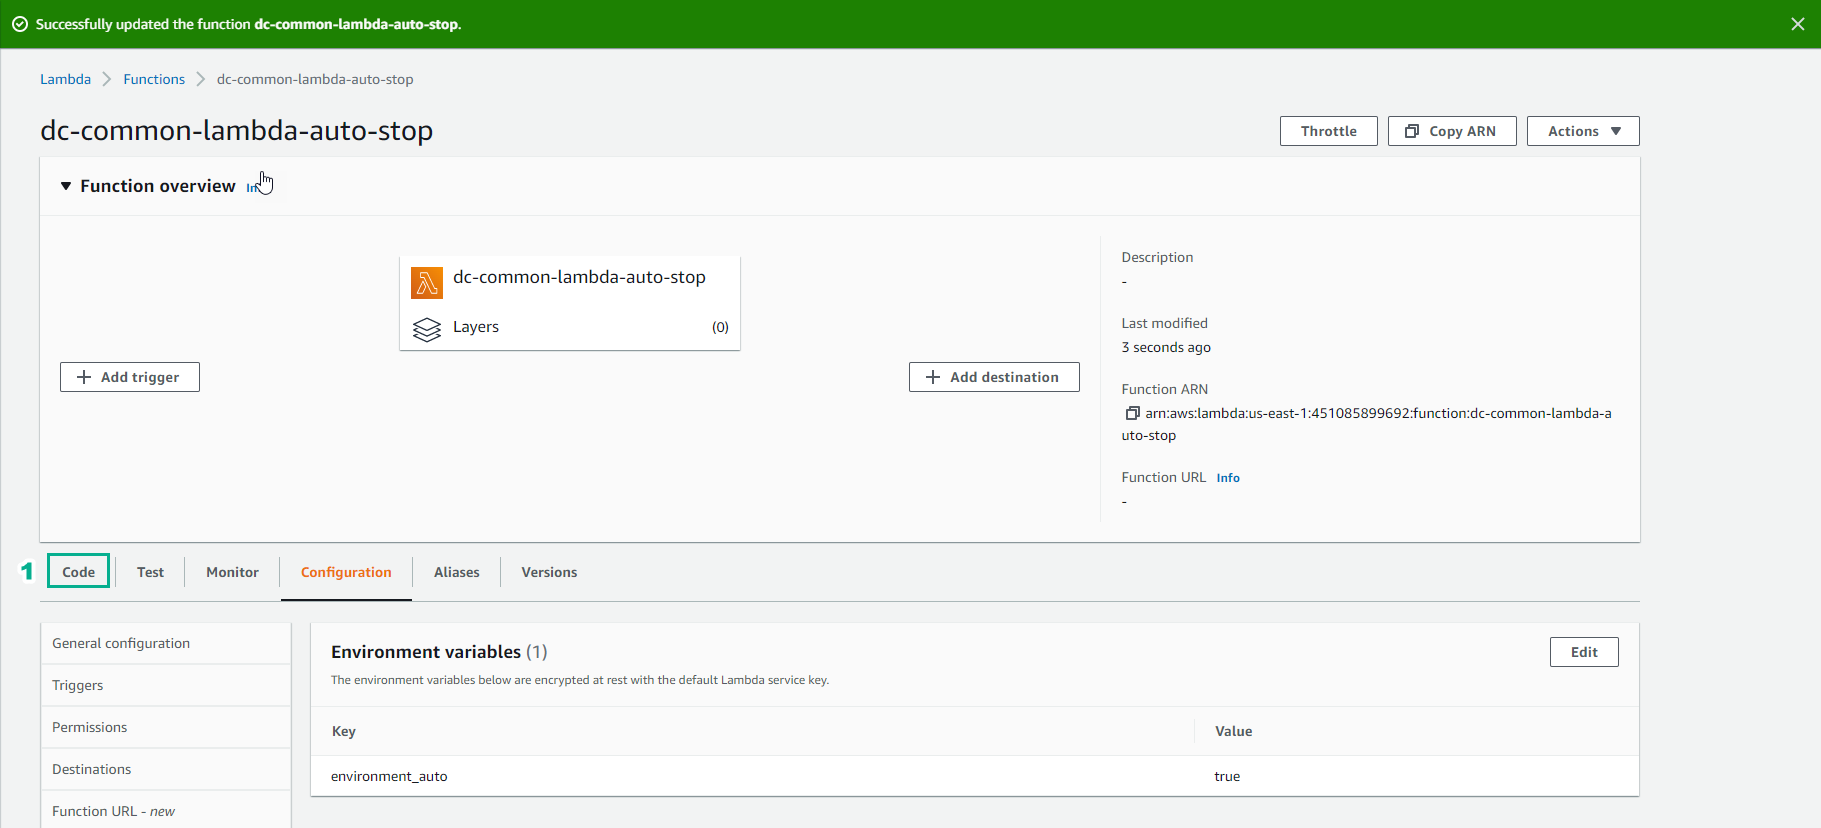
- Trong giao diện Code source
- Import source code: Bạn cần phải thay đổi webhook_url để nhận thông báo đến Slack.
import boto3
import os
import json
import logging
import urllib3

logger = logging.getLogger()
logger.setLevel(logging.INFO)

ec2_resource = boto3.resource('ec2')
http = urllib3.PoolManager()
webhook_url = "https://hooks.slack.com/services/XXXXX/XXXXX/XXXXX"  # Thay bằng Webhook URL của bạn

def lambda_handler(event, context):
    environment_auto = os.environ.get('environment_auto')
    if not environment_auto:
        logger.info('Target is empty')
        return {
            "statusCode": 400,
            "body": "Environment variable 'environment_auto' is not set"
        }

    instances = ec2_resource.instances.filter(
        Filters=[{'Name': 'tag:environment_auto', 'Values': [environment_auto]}]
    )

    instance_list = list(instances)
    if not instance_list:
        return {
            "statusCode": 500,
            "body": "Target Instance is None"
        }

    action_stop = instances.stop()
    send_slack(action_stop)
    return {
        "statusCode": 200,
        "body": "EC2 Stopping"
    }


def send_slack(action_stop):
    list_instance_id = []
    if (
        len(action_stop) > 0
        and "StoppingInstances" in action_stop[0]
        and len(action_stop[0]["StoppingInstances"]) > 0
    ):
        for instance in action_stop[0]["StoppingInstances"]:
            list_instance_id.append(instance["InstanceId"])

        msg = f"Stopping Instances ID:\n {list_instance_id}"
        data = {"text": msg}
        http.request(
            "POST",
            webhook_url,
            body=json.dumps(data).encode("utf-8"),
            headers={"Content-Type": "application/json"}
        )
    else:
        logger.info('Not found Instances Stop')
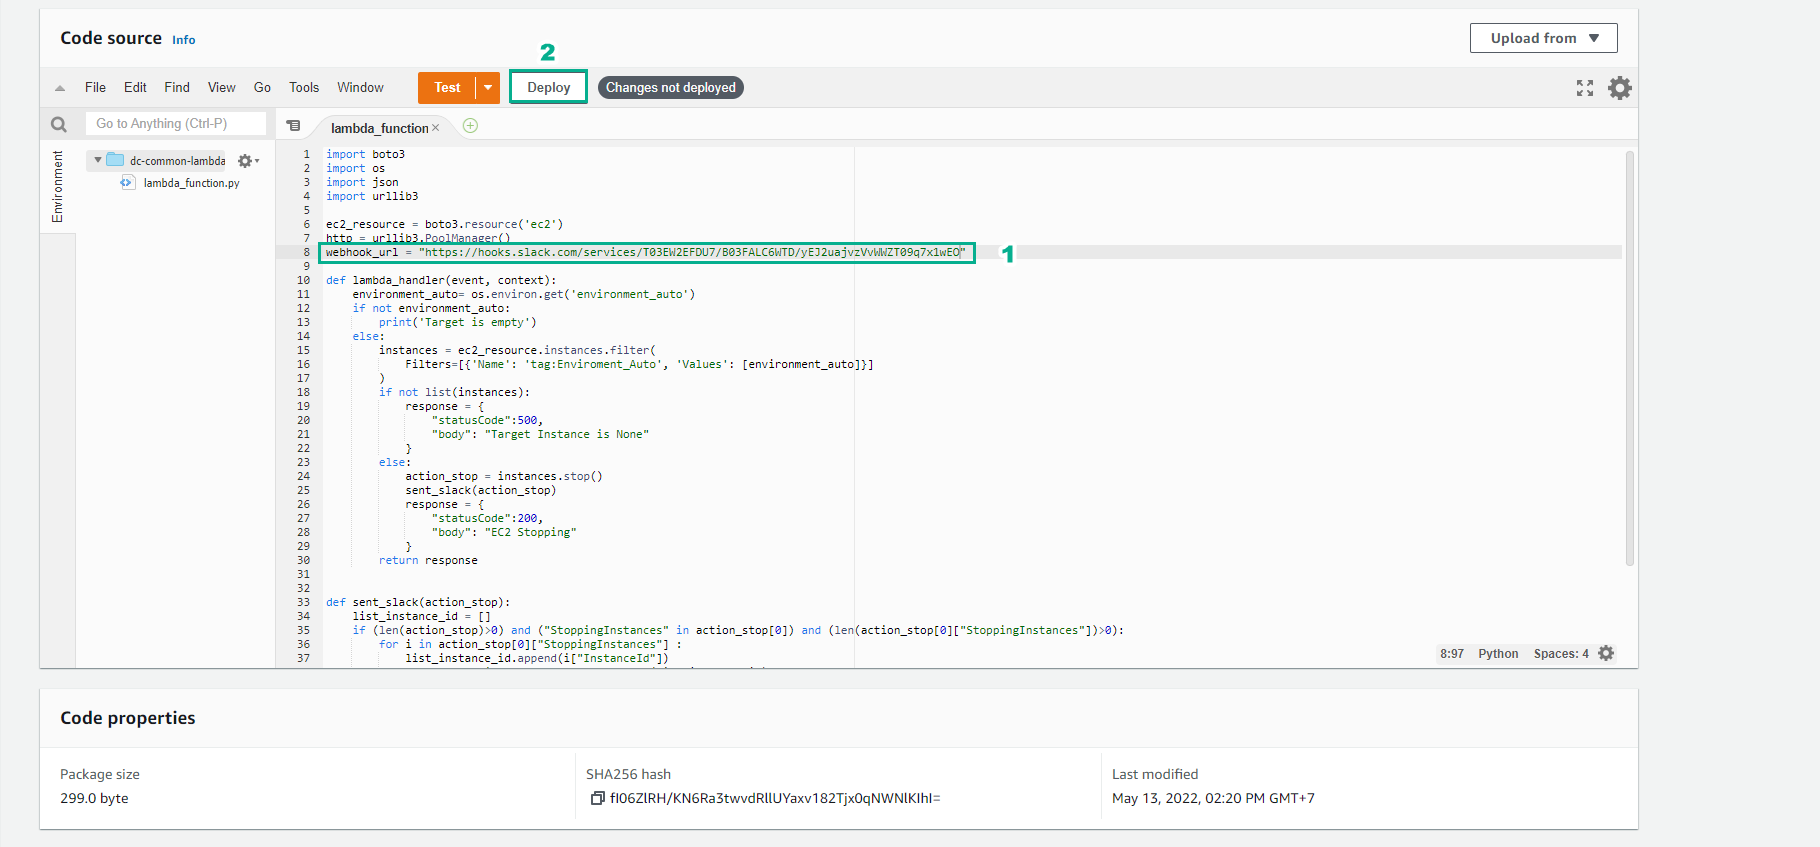
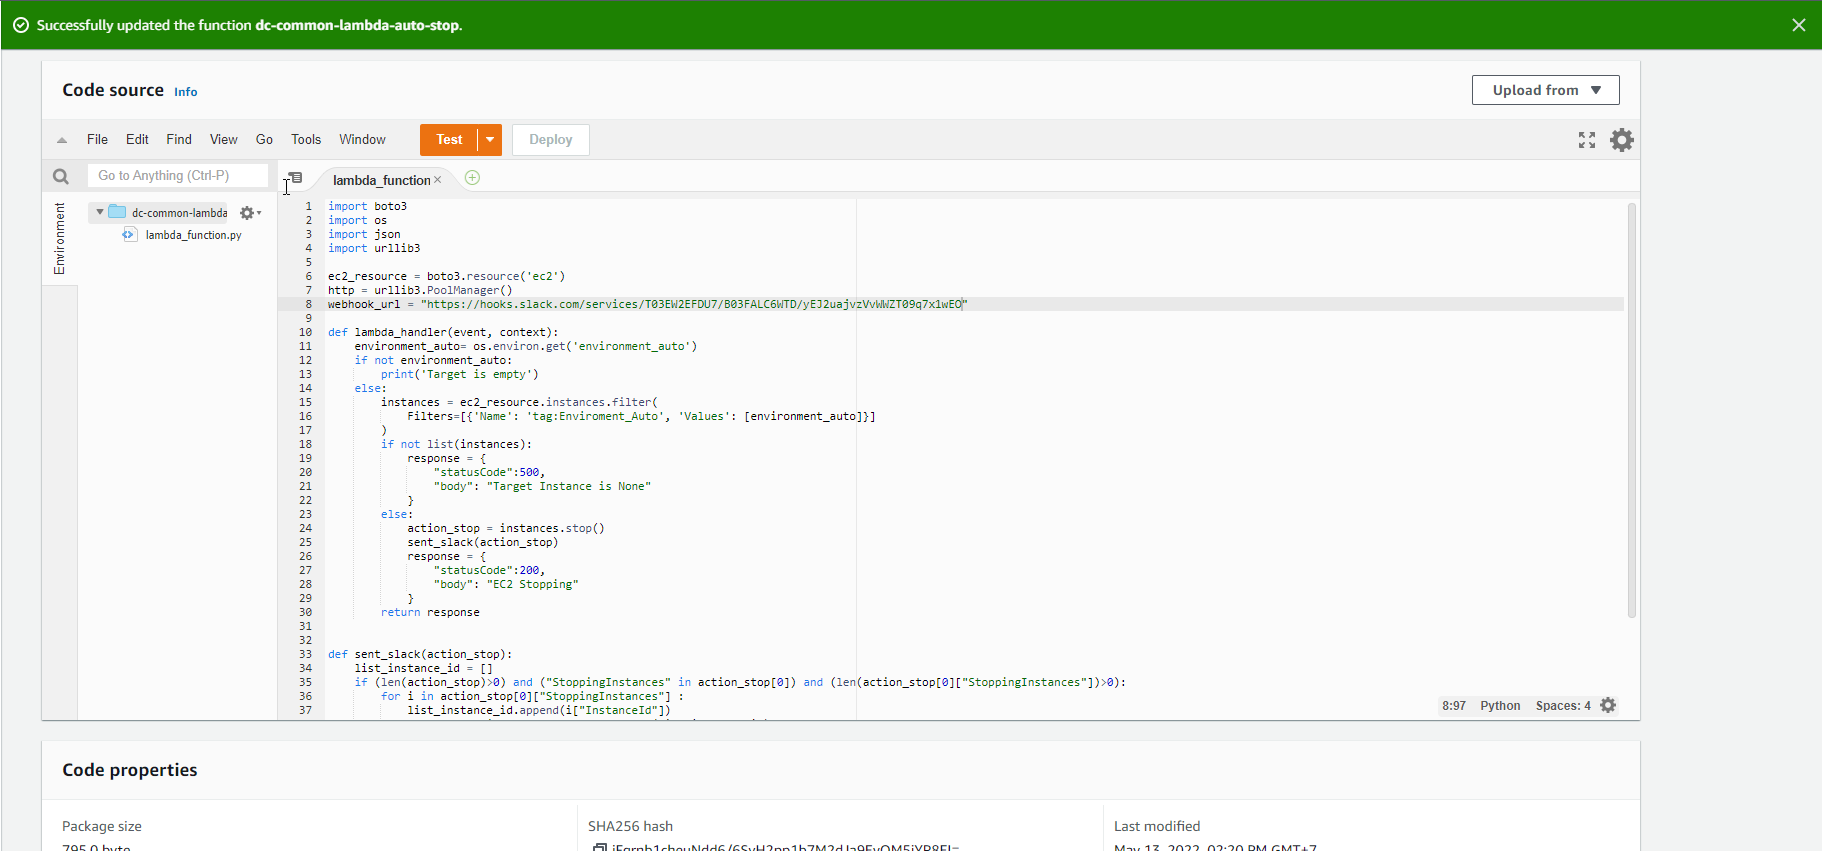
- Sau đó lưu lại và chọn Deploy
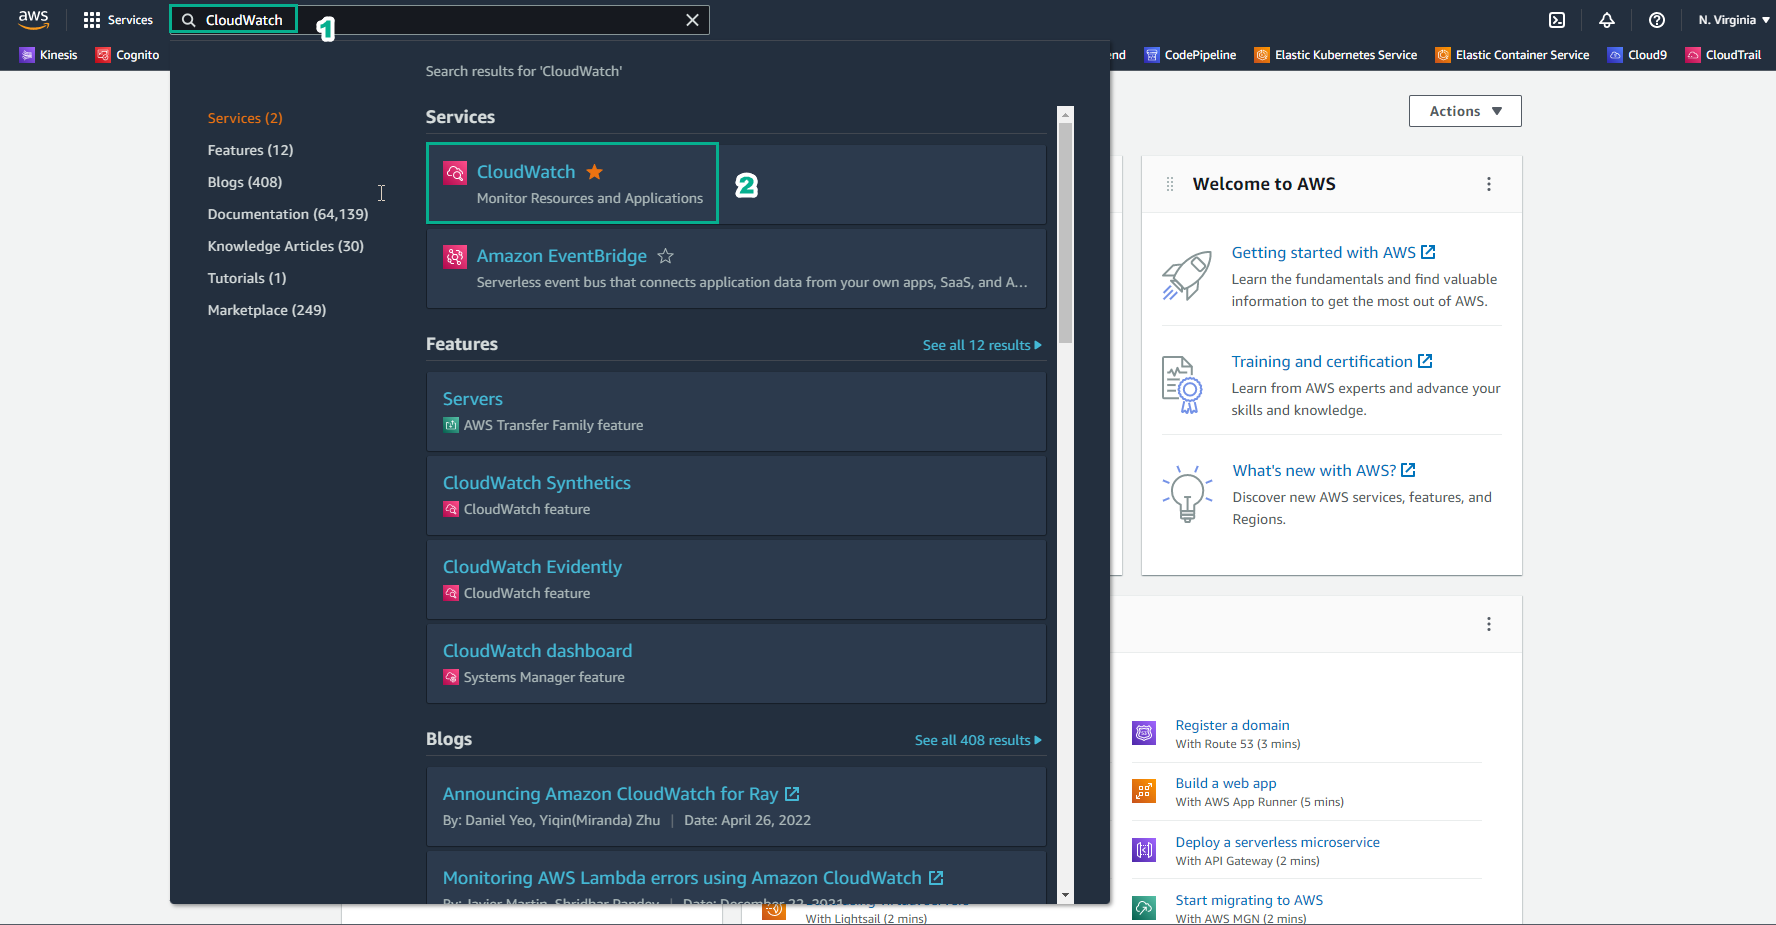
- Truy cập AWS Management Console
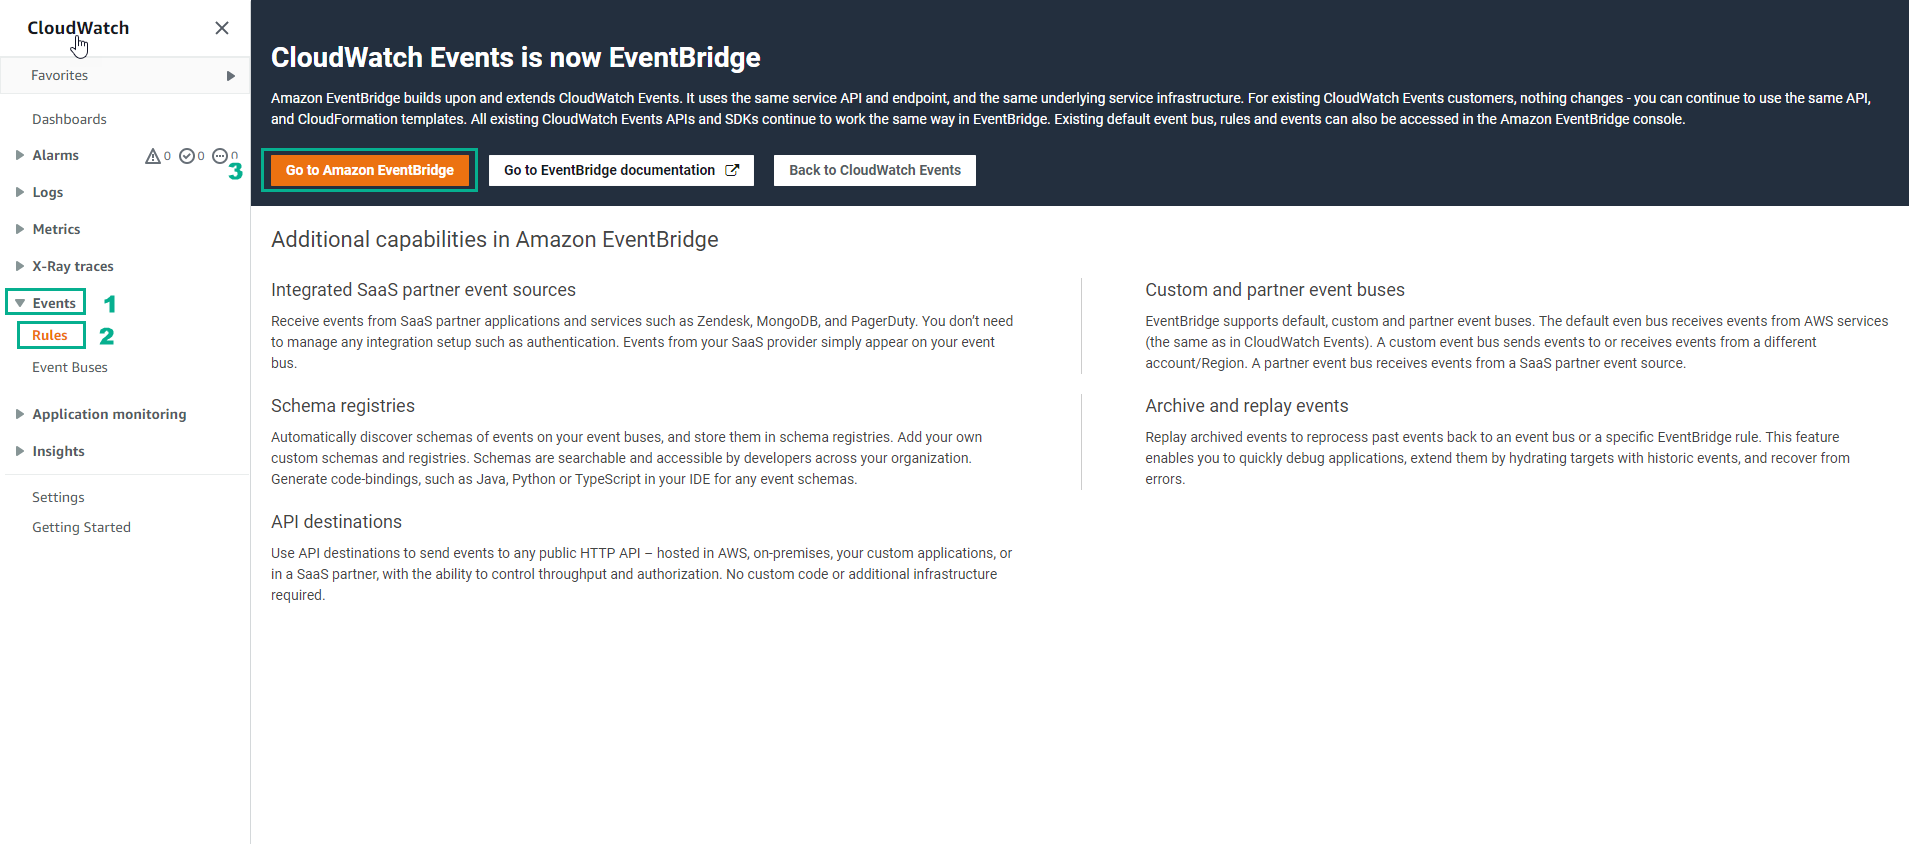
- Tìm EventBridge
- Chọn Amazon EventBridge
- Trong giao diện Amazon EventBridge
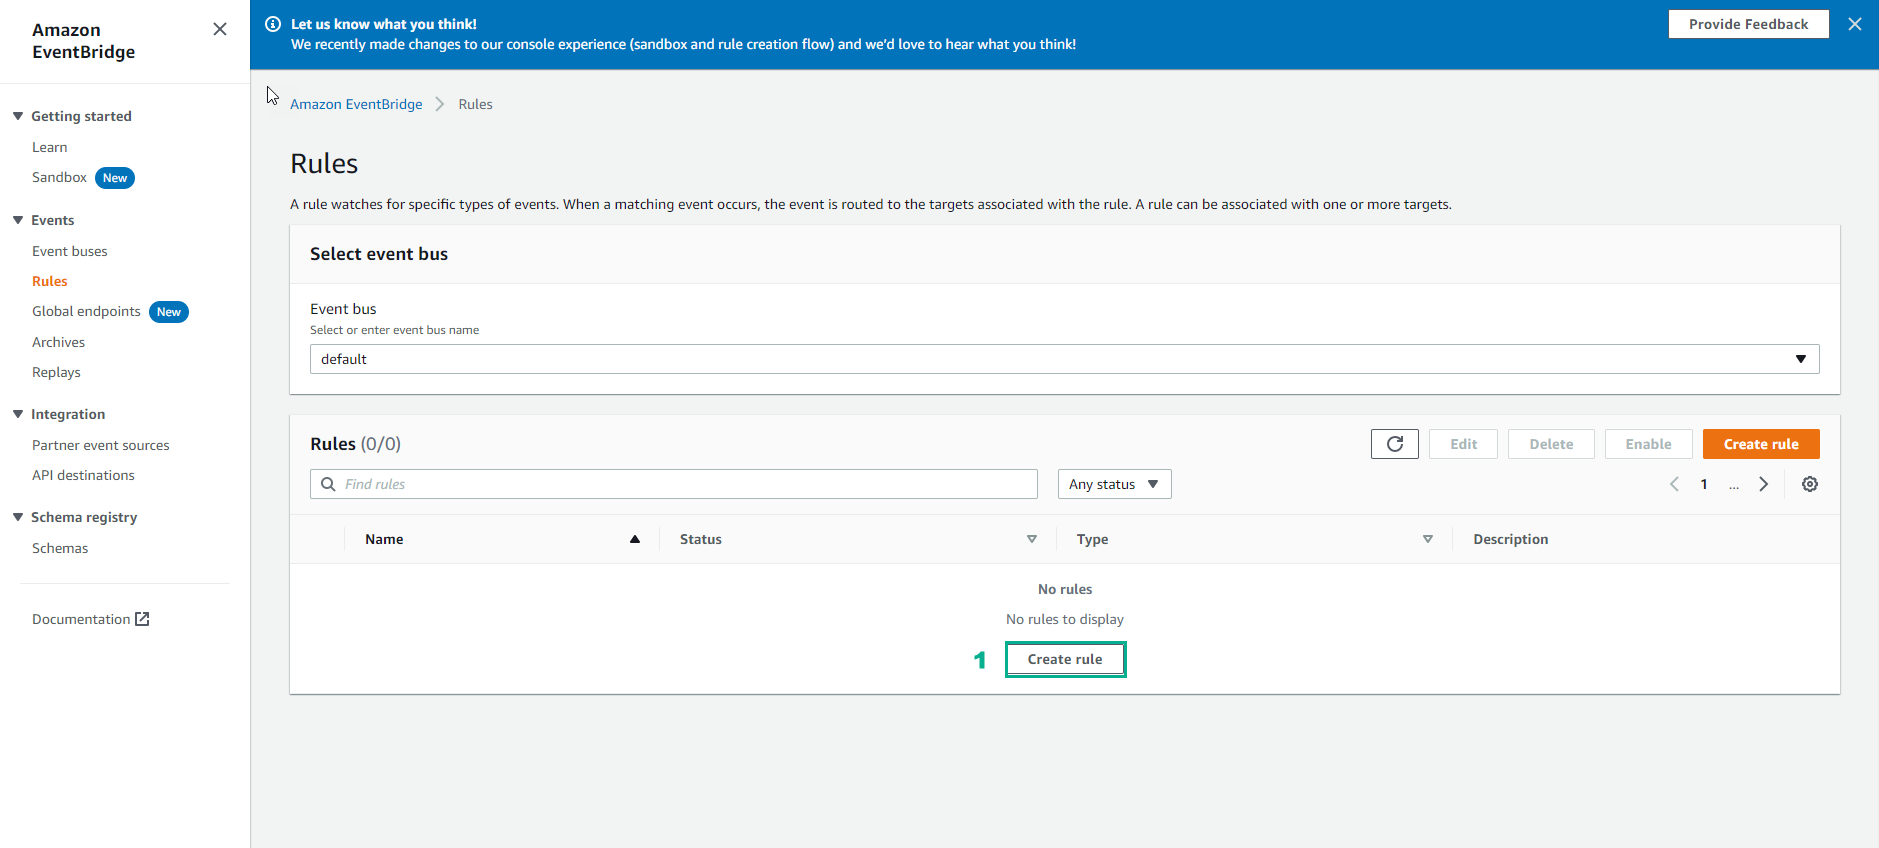
- Ở menu thanh điều hướng bên trái, chọn Schedules (hoặc Scheduler > Schedules)
- Chọn Create schedule
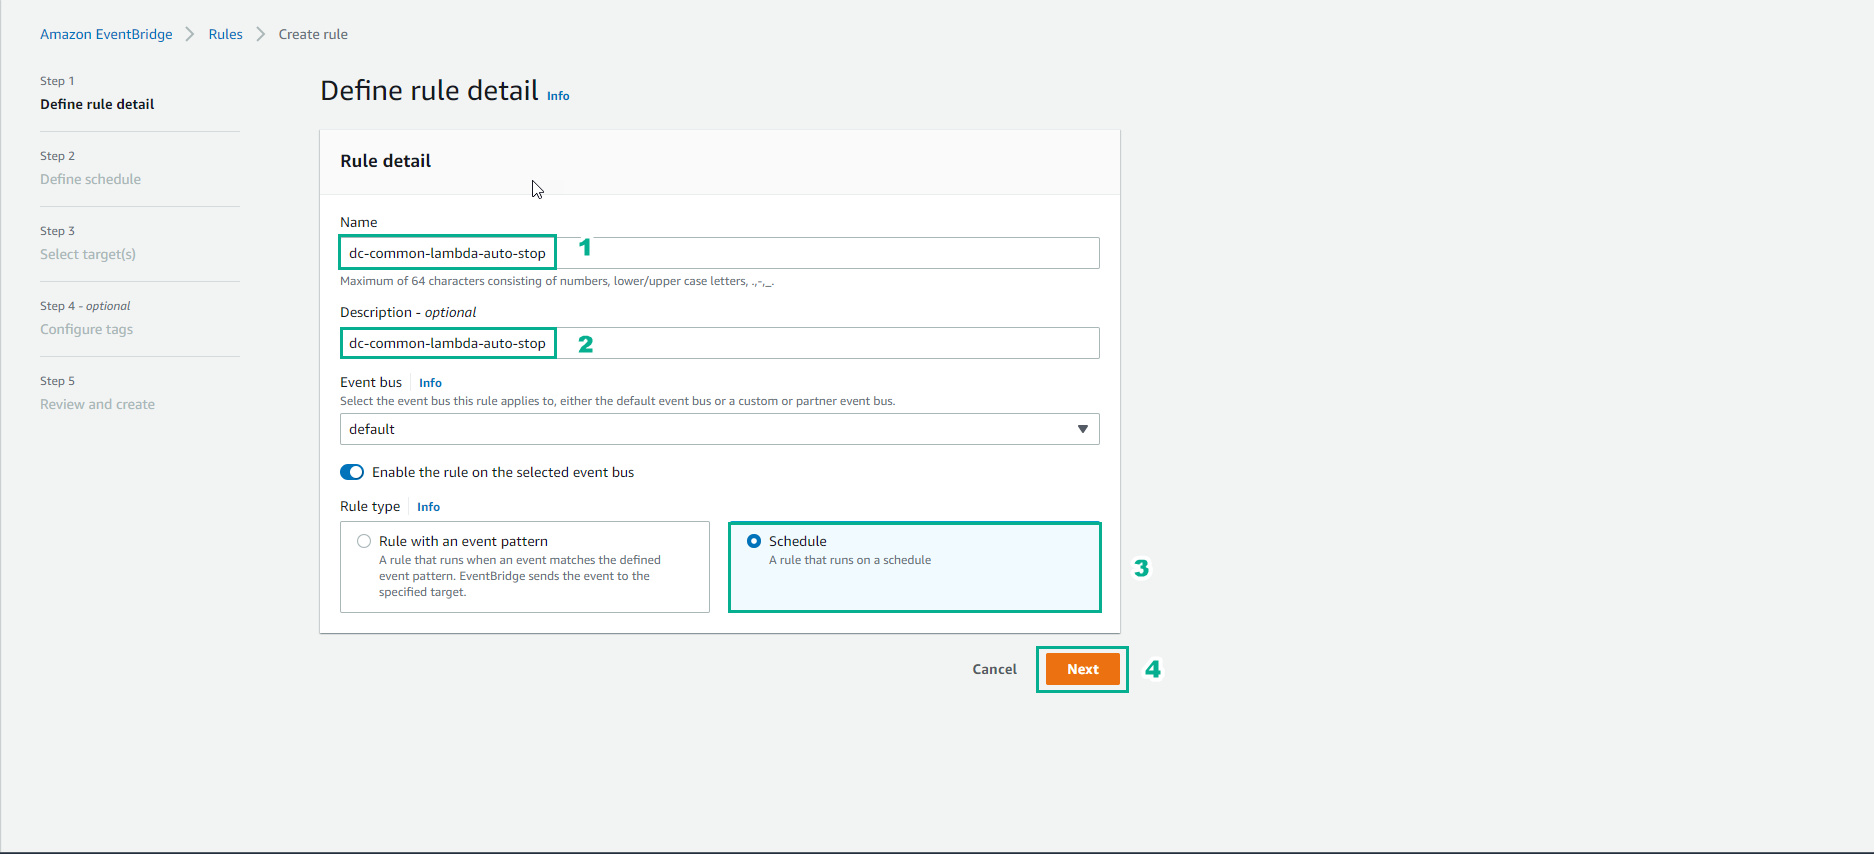
- Trong Step 1: Specify schedule detail
- Schedule name: nhập
dc-common-lambda-auto-stop - Description: nhập
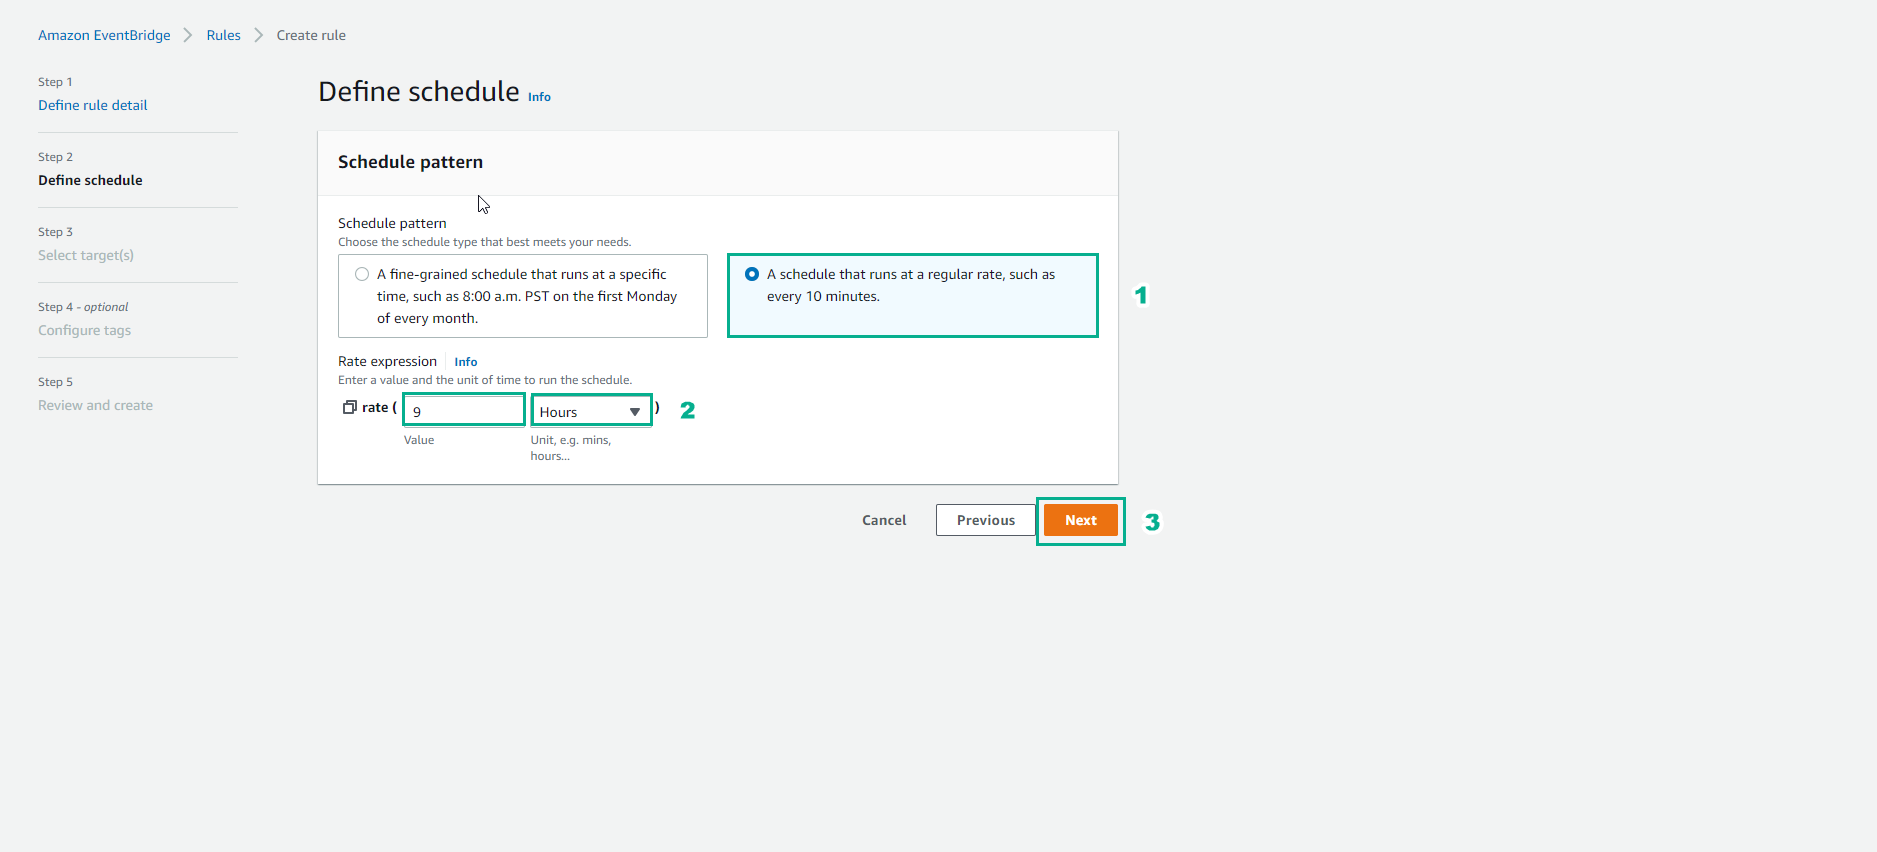
dc-common-lambda-auto-stop - Trong phần Schedule pattern:
- Chọn Recurring schedule
- Schedule type: chọn Rate-based schedule
- Rate expression: nhập
9 và đơn vị chọn hours (hoặc chọn khoảng thời gian mong muốn) - Phần Flexible time window: chọn Off
- Chọn Next
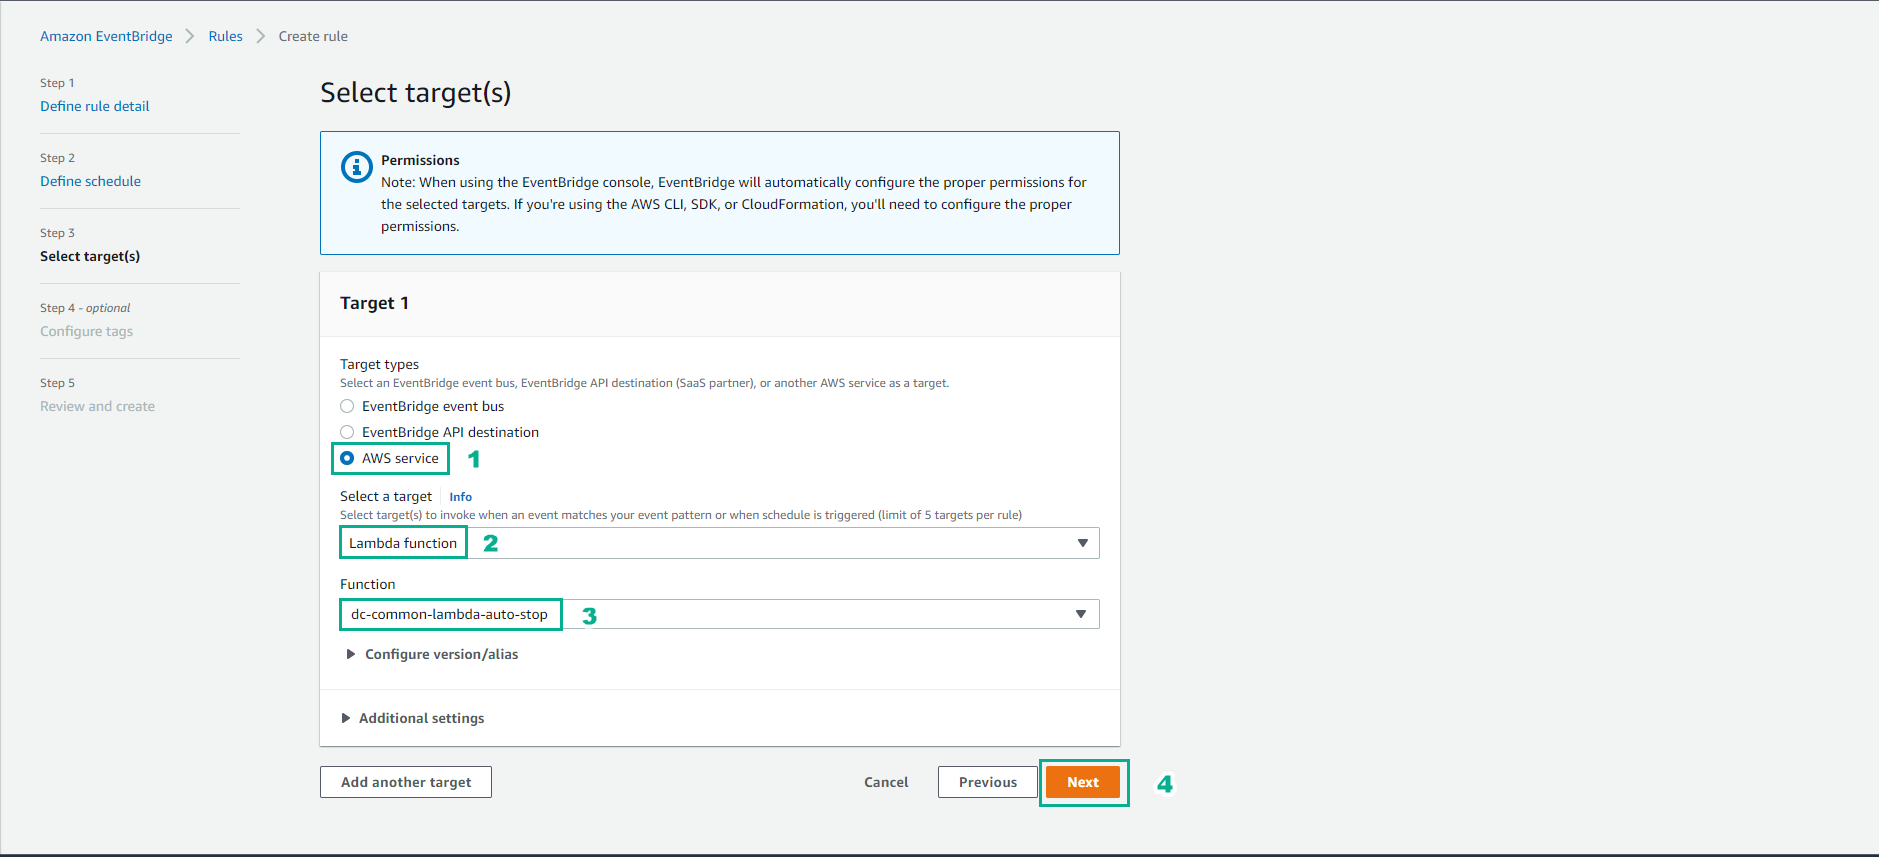
- Trong Step 2: Select target
- Trong danh sách các target, chọn AWS Lambda (hoặc tìm Lambda Invoke)
- Lambda function: chọn function
dc-common-lambda-auto-stop đã tạo ở các bước trước - Chọn Next
- Trong Step 3: Settings
- Giữ các cấu hình mặc định (Execution role, Retry policy…)
- Chọn Next
- Trong Step 4: Review and create schedule
- Kiểm tra lại toàn bộ thông tin
- Chọn Create schedule để hoàn tất việc lập lịch tự động chạy Lambda Function dừng EC2 instance.